|
|
program manager |
|
|
||
|
|
Triple booting on an old PC, part 1: partitioning and Windows XP |
What we are installing onSo I recently cobbled together a (sort of) early 2000s PC! What's inside this piece of history?
The motherboard takes PCI Express cards, which is handy as I had a PCI Express 8500 GT laying around! Old AGP cards are plentiful too, unlike PCI GPUs - most of the time it'll be cheaper to get an AGP motherboard and AGP GPU than a decent PCI GPU. It takes up to 2 GB of RAM but I limited myself to one as I like making my life harder :3 I also had the disks laying around waiting for a PC to use them and they are ENORMOUS for the period of this PC, so why not install a lot of operating systems? No, I'm totally not installing them out of boredom, it's for testing my software on many platforms! I thought I would definitely want a Windows system for running games and other old software from the period (a lot of 90s/00s software aged so well) and a modern Unix system to see if this ancient potato can handle some modern things. I'll also add DOS for very old games and low-level experiments and maybe ReactOS, because what's better than an open-source oldschool Windows? Now let's take a look at the operating systems I chose and how to get them working together! I decided to make a tutorial series about this as getting this many systems working together on a machine this old can be confusing. I split it into 3 parts, 1 part per operating system - the first part will be Windows XP. Windows XPI'm a HUGE fan of fres software, almost a zealot, but I can't deny old versions of Windows were designed very well - they didn't use a lot of resources, the GUI was very uniform and customizable, and let's not forget all the software made for them! A lot of it is still usable to this day and well optimized compared to most modern software. I went with Windows XP as it's a lot lighter than Vista while having more software compatibility than 9x/2000. This computer could theoretically handle up to Windows 7 - Windows 8 requires some newer CPU features. The Sempron 2600+ CPU is a 64-bit CPU - it could technically run the 64-bit edition of XP, but I went with the 32-bit edition as it has more drivers, is generally more compatible with stuff and might use less RAM on this single-gigabyte PC. In this triple boot setup, I'm installing Windows first as it automatically overwrites the MBR unlike the other systems. This computer has a DVD drive (like almost every PC in the 2000s), so we're installing from the good old CD.
First though, we'll be using a Linux ISO to prepartition the disks, as Windows XP installer's partitioning interface is very primitive and Linux fdisk is one of the most flexible partitioning tools I know. The Sempron 2600+ is an early x86-64 CPU and it can actually boot the latest x86-64 Arch Linux ISO! The Arch live DVD takes a while to load but in about 5 minutes we get to a shell prompt. You don't have to specifically use Arch, but a command-line live CD like Arch, Gentoo or Void Linux will perform better than a GUI one. I used Arch as I had a DVD with it already burned, but Void is genrally lighter and has better 32-bit support if your CPU is 32-bit. Partitioning(skip)The motherboard supports SATA - no need to deal with IDE adapters. Let's check which disk was detected as sda: # fdisk -l /dev/sda It will print out info about the disk (size, BIOS name) and its partition table: Disk /dev/sda: 931.51 GiB, 1000204886016 bytes, 1953525168 sectors Disk model: CT1000MX500SSD1 Units: sectors of 1 * 512 = 512 bytes Sector size (logical/physical): 512 bytes / 4096 bytes I/O size (minimum/optimal): 4096 bytes / 4096 bytes Disklabel type: dos Disk identifier: 0x52bf38d7 For me, sda is the SSD, just as I expected. This might be different for you - sda is the 1st disk, sdb is the 2nd disk, sdc is the 3rd and so on. Try different drive letters with "fdisk -l" until you find the disk you're going to multi boot on. Having found the correct disk, now we can run: # fdisk /dev/sda to partition it with the command line. There are TUI/GUI tools too like cfdisk and gparted, but I know Linux fdisk like the back of my hand so that's what I will be using. 1 GB of RAM generally should be enough to boot a live CD with GUI but it'll likely be slow. I already backed up everything on this SSD, so I'll create a new MBR partition table by typing "o" (without quotes). The partition sizes I decided to make are:
That leaves half of the SSD unused, which lets its controller wear the flash memory more evenly. A disk can have up to 4 primary partitions, and I'm installing 3 systems, so I'm going to make all their partitions primary. The 4th partition could later become an extended partition, which can house a lot more logical partitions. To create a primary partition with fdisk, we need to type "n", then select primary with "p" when it asks, then accept the default start position with Enter and finally type size: 100 GB is +100G.
Command (m for help): n
Partition type
p   primary (3 primary, 0 extended, 1 free)
e   extended (container for logical partitions)
Select (default e): p
Selected partition 4
First sector (838862848-1953525167, default 838862848):
Last sector, +/-sectors or +/-size{K,M,G,T,P} (838862848-1953525167, default 1953525167): +100g
Created a new partition 4 of type 'Linux' and of size 100 GiB.
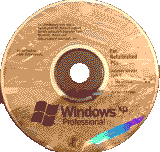
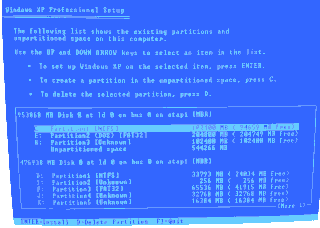
After creating the partitions, let's check if they are the right size with "p": Device Boot Start End Sectors Size Id Type /dev/sda1 2048 209717247 209715200 100G 83 Linux /dev/sda2 209717248 629147647 419430400 200G 83 Linux /dev/sda3 629147648 838862847 209715200 100G 83 Linux Now we have to set partition types, so the computer knows if it's meant for NTFS, FAT32 and so on. It's similar to creating them, but this time we use "t": Command (m for help): t Partition number (1-3, default 4): 1 Hex code or alias (type L to list all): 07 Changed type of partition 'Linux' to 'HPFS/NTFS/exFAT'. The hex type numbers may seem daunting, but typing L will show you all the codes you can use! The codes we need in this setup are 07 for NTFS (which we use on the Windows partition), 0C for FAT32 and A6 for the OpenBSD partition. There is one more thing to do - set the boot flag on the partition that will have Windows XP. If we don't do this, the system may have trouble booting. This is done with the "a" command: Command (m for help): a Partition number (1-3, default 4): 1 The bootable flag on partition 1 is enabled now. We're mostly done with fdisk! Now we need to check the partition table for the last time with "p": Device Boot Start End Sectors Size Id Type /dev/sda1 * 2048 209717247 209715200 100G 7 HPFS/NTFS/exFAT /dev/sda2 209717248 629147647 419430400 200G c W95 FAT32 (LBA) /dev/sda3 629147648 838862847 209715200 100G a6 OpenBSD All good - let's save the partition table with "w" (which will delete everything on the disk). Before typing "w", make sure the partition setup is correct and that you backed up important data from your disk! I'm not responsible for any data loss from improperly following this post. If you don't want to use the new parttion table, type "q" to exit fdisk wihtout saving. The partitions are not formatted yet. I'm going to format the NTFS and OpenBSD partitions with their respective operating systems, but I will format the FAT32 one in Linux as Windows refuses to format large partitions as FAT32 for some stupid reason. The command for this is: # mkfs.vfat -F 32 -n "your partition label" /dev/sda2 Obviously, sda2 is my FAT32 partition - yours might be different (if unsure, check with "fdisk -l"). Now onto installing Windows XP onto one of those partitions! InstallingWe reboot out of the Linux ISO by typing "shutdown -r now" and put a Windows XP install CD in. When the computer says "Press any key to boot from CD....", press any key. I set the BIOS in this PC to boot from CD as highest priority, some BIOSes might need you to manually select it from the boot menu (usually accsesed with F12, F11 or DEL). SATA on this motherboard just works with the stock XP installation. However, most newer motherboards will refuse to boot the installer unless you put SATA drivers into the install image or set SATA in BIOS to compatibility mode instead of AHCI. Compatibility mode is the simplest solution, but your disks will be slower and installing SATA drivers post-install can be iffy. Drivers can be added to the installer with nLite. They can also be loaded from a floppy, but if you need SATA drivers, your PC most likely lacks a floppy drive. If you need SATA drivers, you will know - the installer will either BSOD or fail to detect any disks. After accepting the license with F8, we get to the partitioning screen:
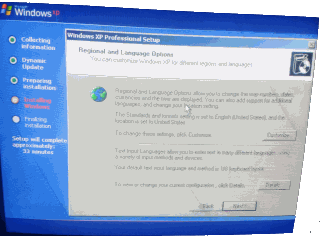
Your partition screen likely won't have this many partitions - I had a lot of them on my second disk. Select the first partition on the correct disk with arrow keys and ENTER, then do a quick NTFS format. Then we select that partition for installing and let the installer copy files. Installing, stage 2After copying files, the system will reboot. Do not press any key when it asks to boot from CD - we want to boot from HDD/SSD this time. The computer boots to a graphical install screen, which will set up for a while and then ask for keyboard settings, timezone, regional settings and the product key.
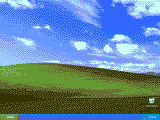
Then we get to the final OOBE - if your sound card is old enough to have builtin drivers in XP, title.wma will start playing. On this screen, we disable automatic updates, as I'll be installing the patches manually and create an user account. And here's freshly installed Windows XP, Bliss wallpaper and all!
That's it for part 1 - in part 2 I'll be installing OpenBSD! This tutorial series won't cover post-installation stuff like drivers, only the initial installations and getting the systems working together. |
||
|
|
blog navigator |

|
||